

Create the flow
- Go to Flows.
- Click New. If you want to modify an existing automation, select the corresponding flow from the table.
- Complete the flow’s basic information.
Basic information
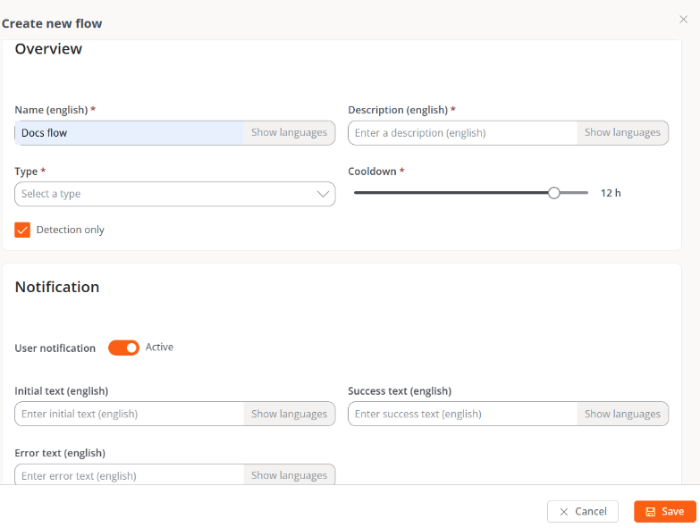
Configure notifications
Optionally, you can display notifications to users before and after the flow runs. The following fields support translations via the Show languages button:- Initial text. Message shown when execution starts.
- Success text. Message shown when execution finishes successfully.
- Error text. Message shown when execution finishes with errors.
Select the target
Define the devices on which the conditions will be evaluated and the actions will be executed. The available options are:- All workspaces. Applies the flow to all devices in the organization.
- Workspaces. Lets you select specific devices.
- Workspace groups. Lets you select one or more workspace groups.
- Reporting groups. Lets you select one or more reporting groups.
Configure the conditions
After saving the flow:- Go to the Flow tab.
- Click Edit.
- Click the + icon.
- Select Add condition.
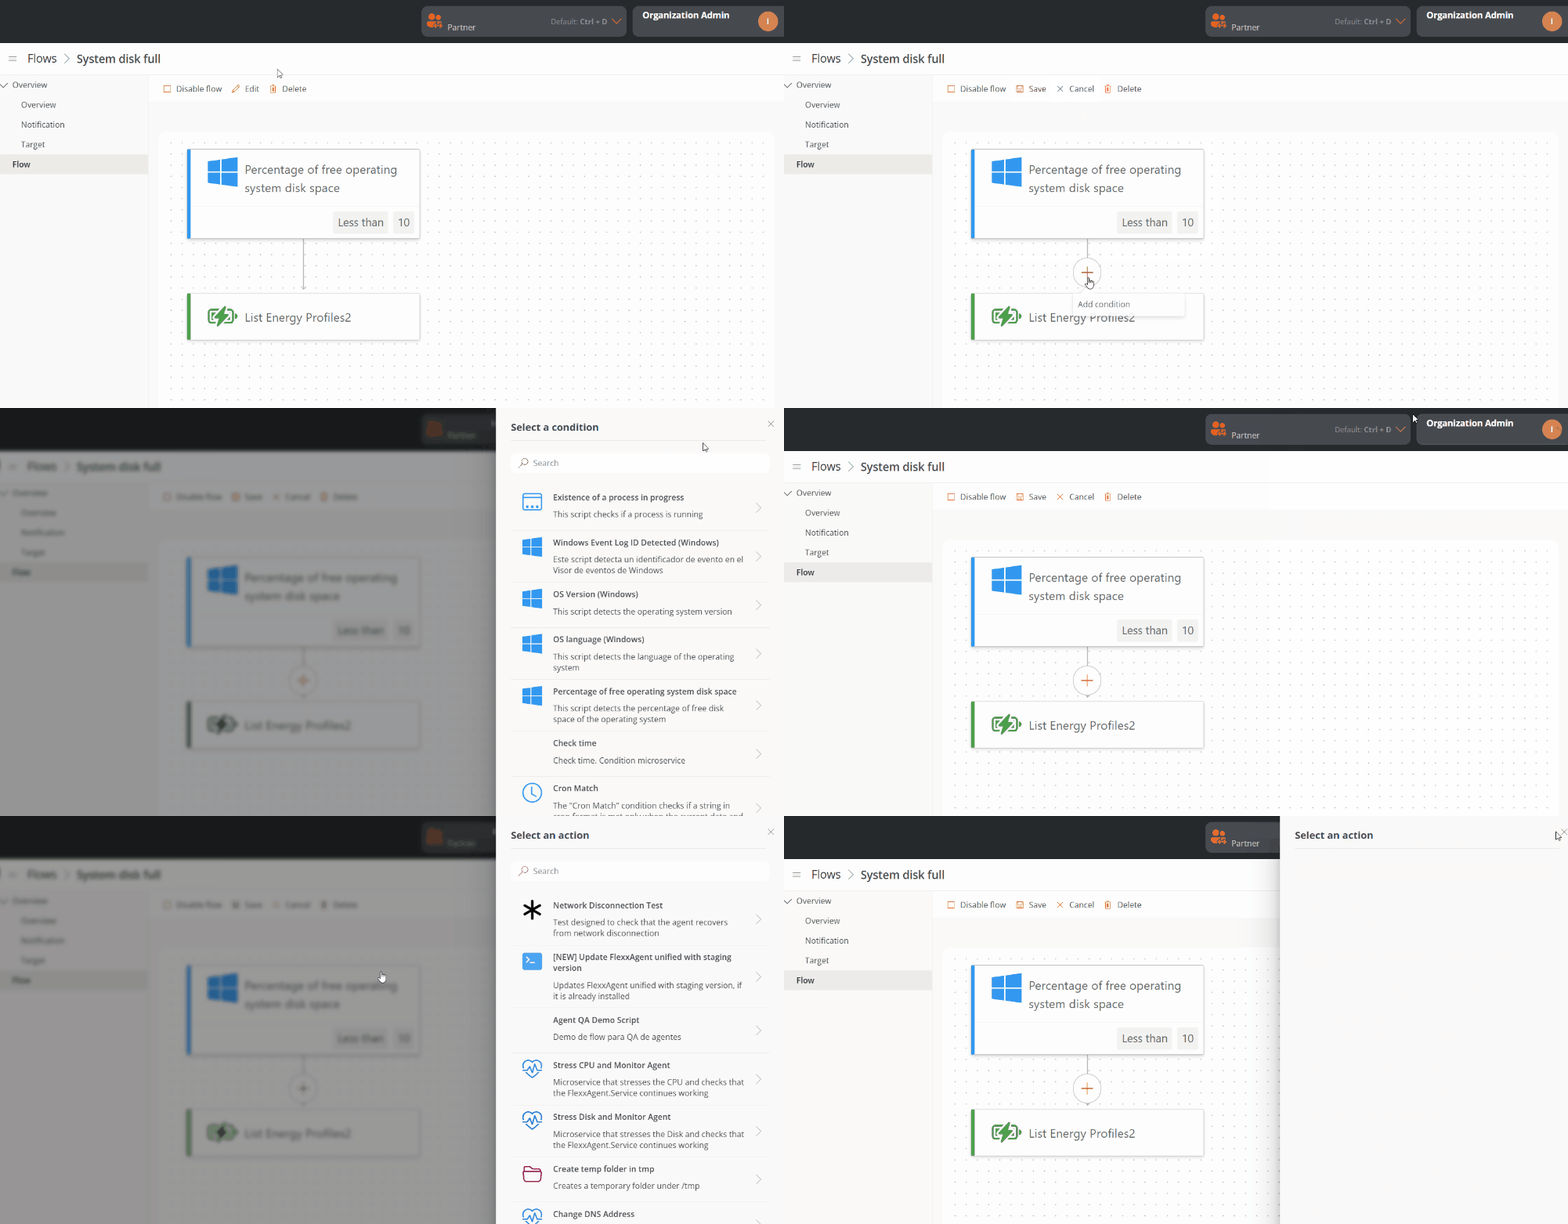
- Select the condition you want to evaluate.
- Configure its parameters.
- Click Save.
You can combine several conditions to create more specific automations.
Add the microservice
Once the condition is created:- Click the + icon below the condition.
- Select Add action.
- Choose the microservice you want to run.
- Configure the required parameters, if any.
- Click Save.
Enable the flow
- Go to the flow’s detail view.
- Click Enable flow.